Sciometa POS · How-to guide
Connecting Viva.com for Online Payments
Use a Viva.com account you already have to take card payments from guests’ phones, by copying three credentials out of Viva’s portal.
Tätä ohjetta ei ole vielä saatavilla omalla kielelläsi, joten näytämme englanninkielisen version.
Create a payment source in Viva
A payment source is the destination your table-order takings are booked to. Sign in to Viva, then open SalesOnline paymentsWebsites / Applications.
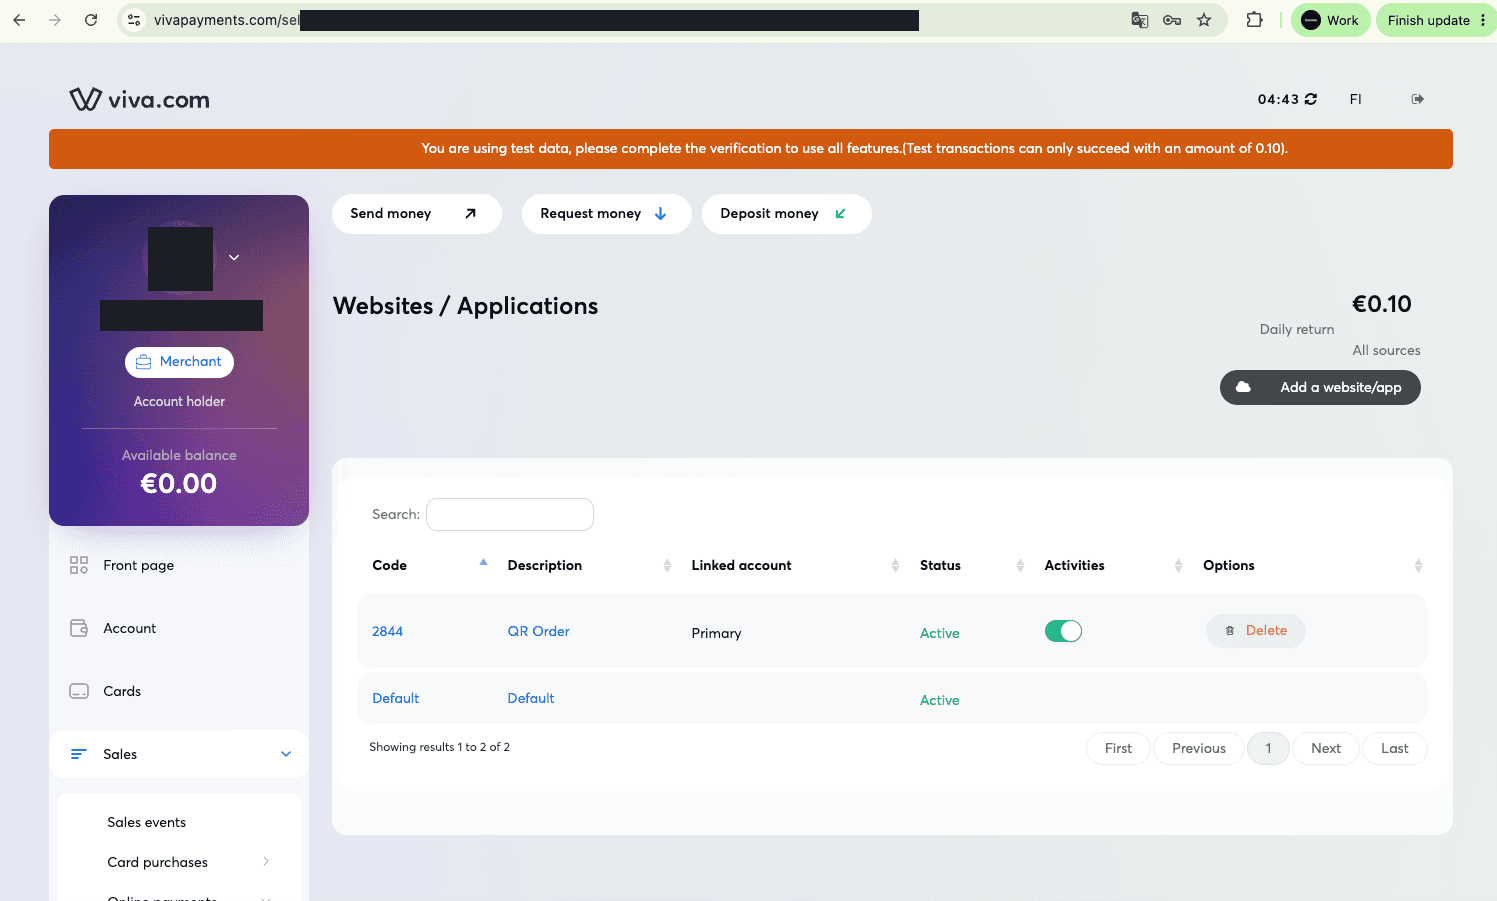
Select Add a website/app at the top right and fill in the dialog.
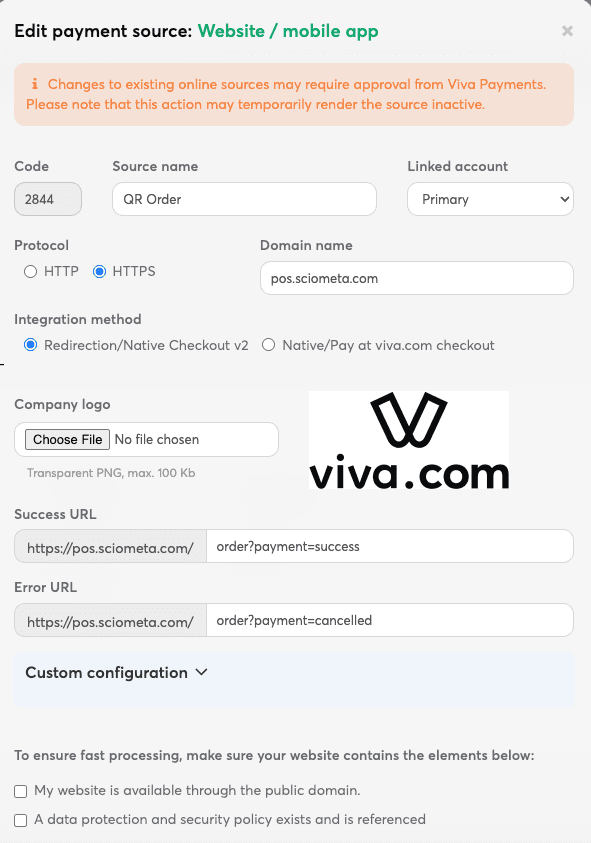
| Field | What to enter |
|---|---|
| Code | A four-digit number, filled in for you. This is the Source Code — write it down, you need it in Step 3. |
| Source name | Something you will recognise in Viva's reports. QR Order works well. |
| Linked account | The Viva account the money is paid into. |
| Protocol | HTTPS. |
| Domain name | pos.sciometa.com — the ordering page, not your restaurant's own website. No https:// and no trailing slash. |
| Integration method | Leave on Redirection/Native Checkout v2. |
| Company logo | Your logo, transparent PNG up to 100 KB. Guests see it on the payment page. |
| Success URL | order?payment=success in the box beside the domain. |
| Error URL | order?payment=cancelled in the box beside the domain. |
This is what a working one looks like once saved:
Copy your Client ID and Client Secret
In Viva, open SettingsAPI IDs.
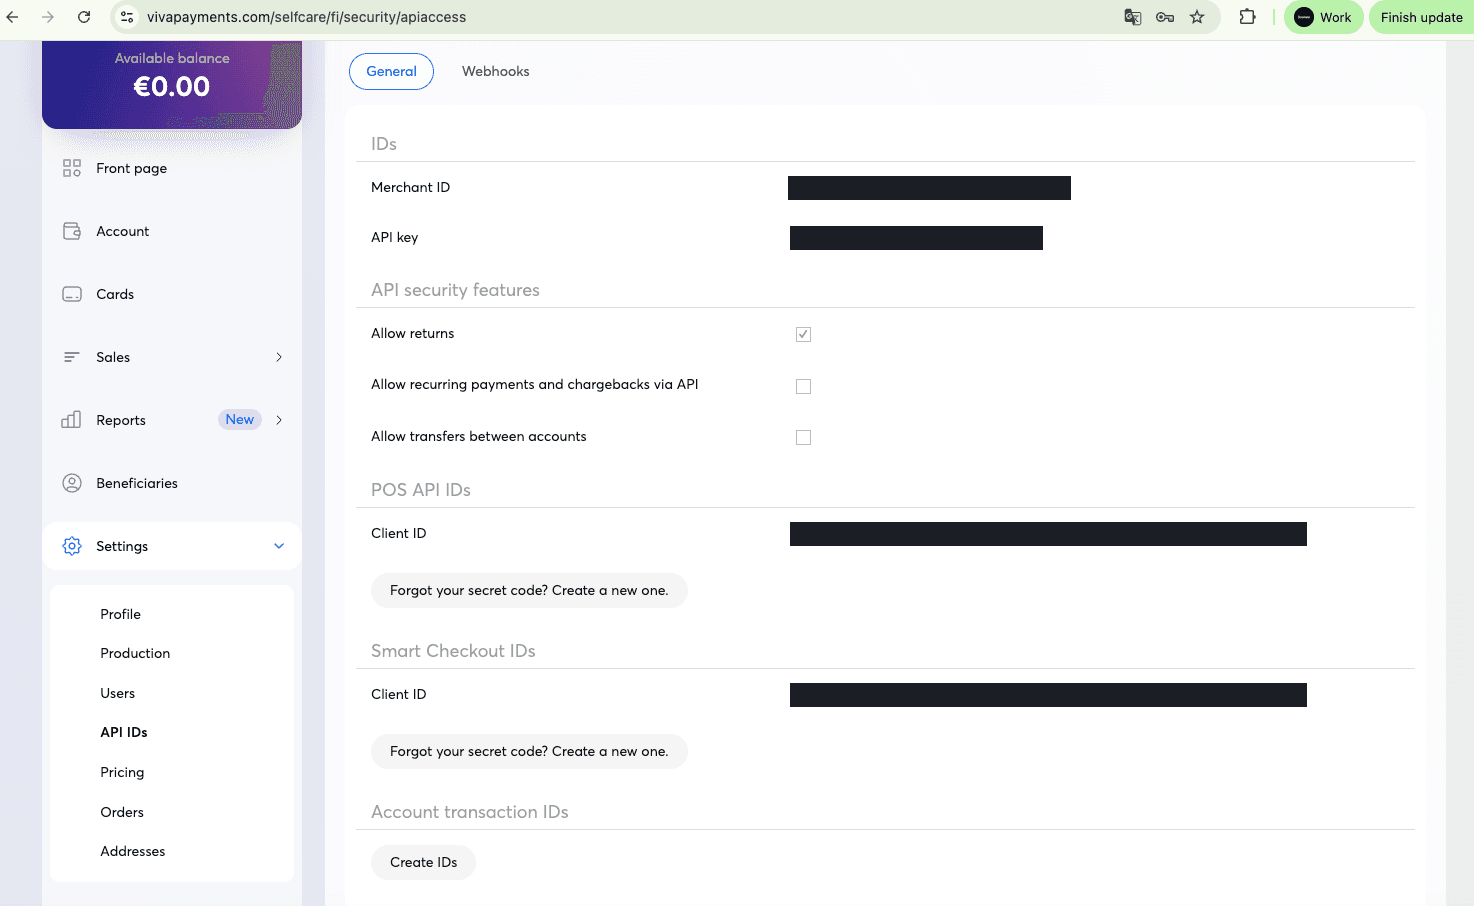
The Client ID is on the page. The Client Secret is not, and that is where people get stuck.
You should now have three things: the Client ID and Client Secret from this page, and the Source Code from Step 1.
Enter them in the dashboard
Open Self Order SystemQR Online Payments — it is under Table Order in the left-hand list.
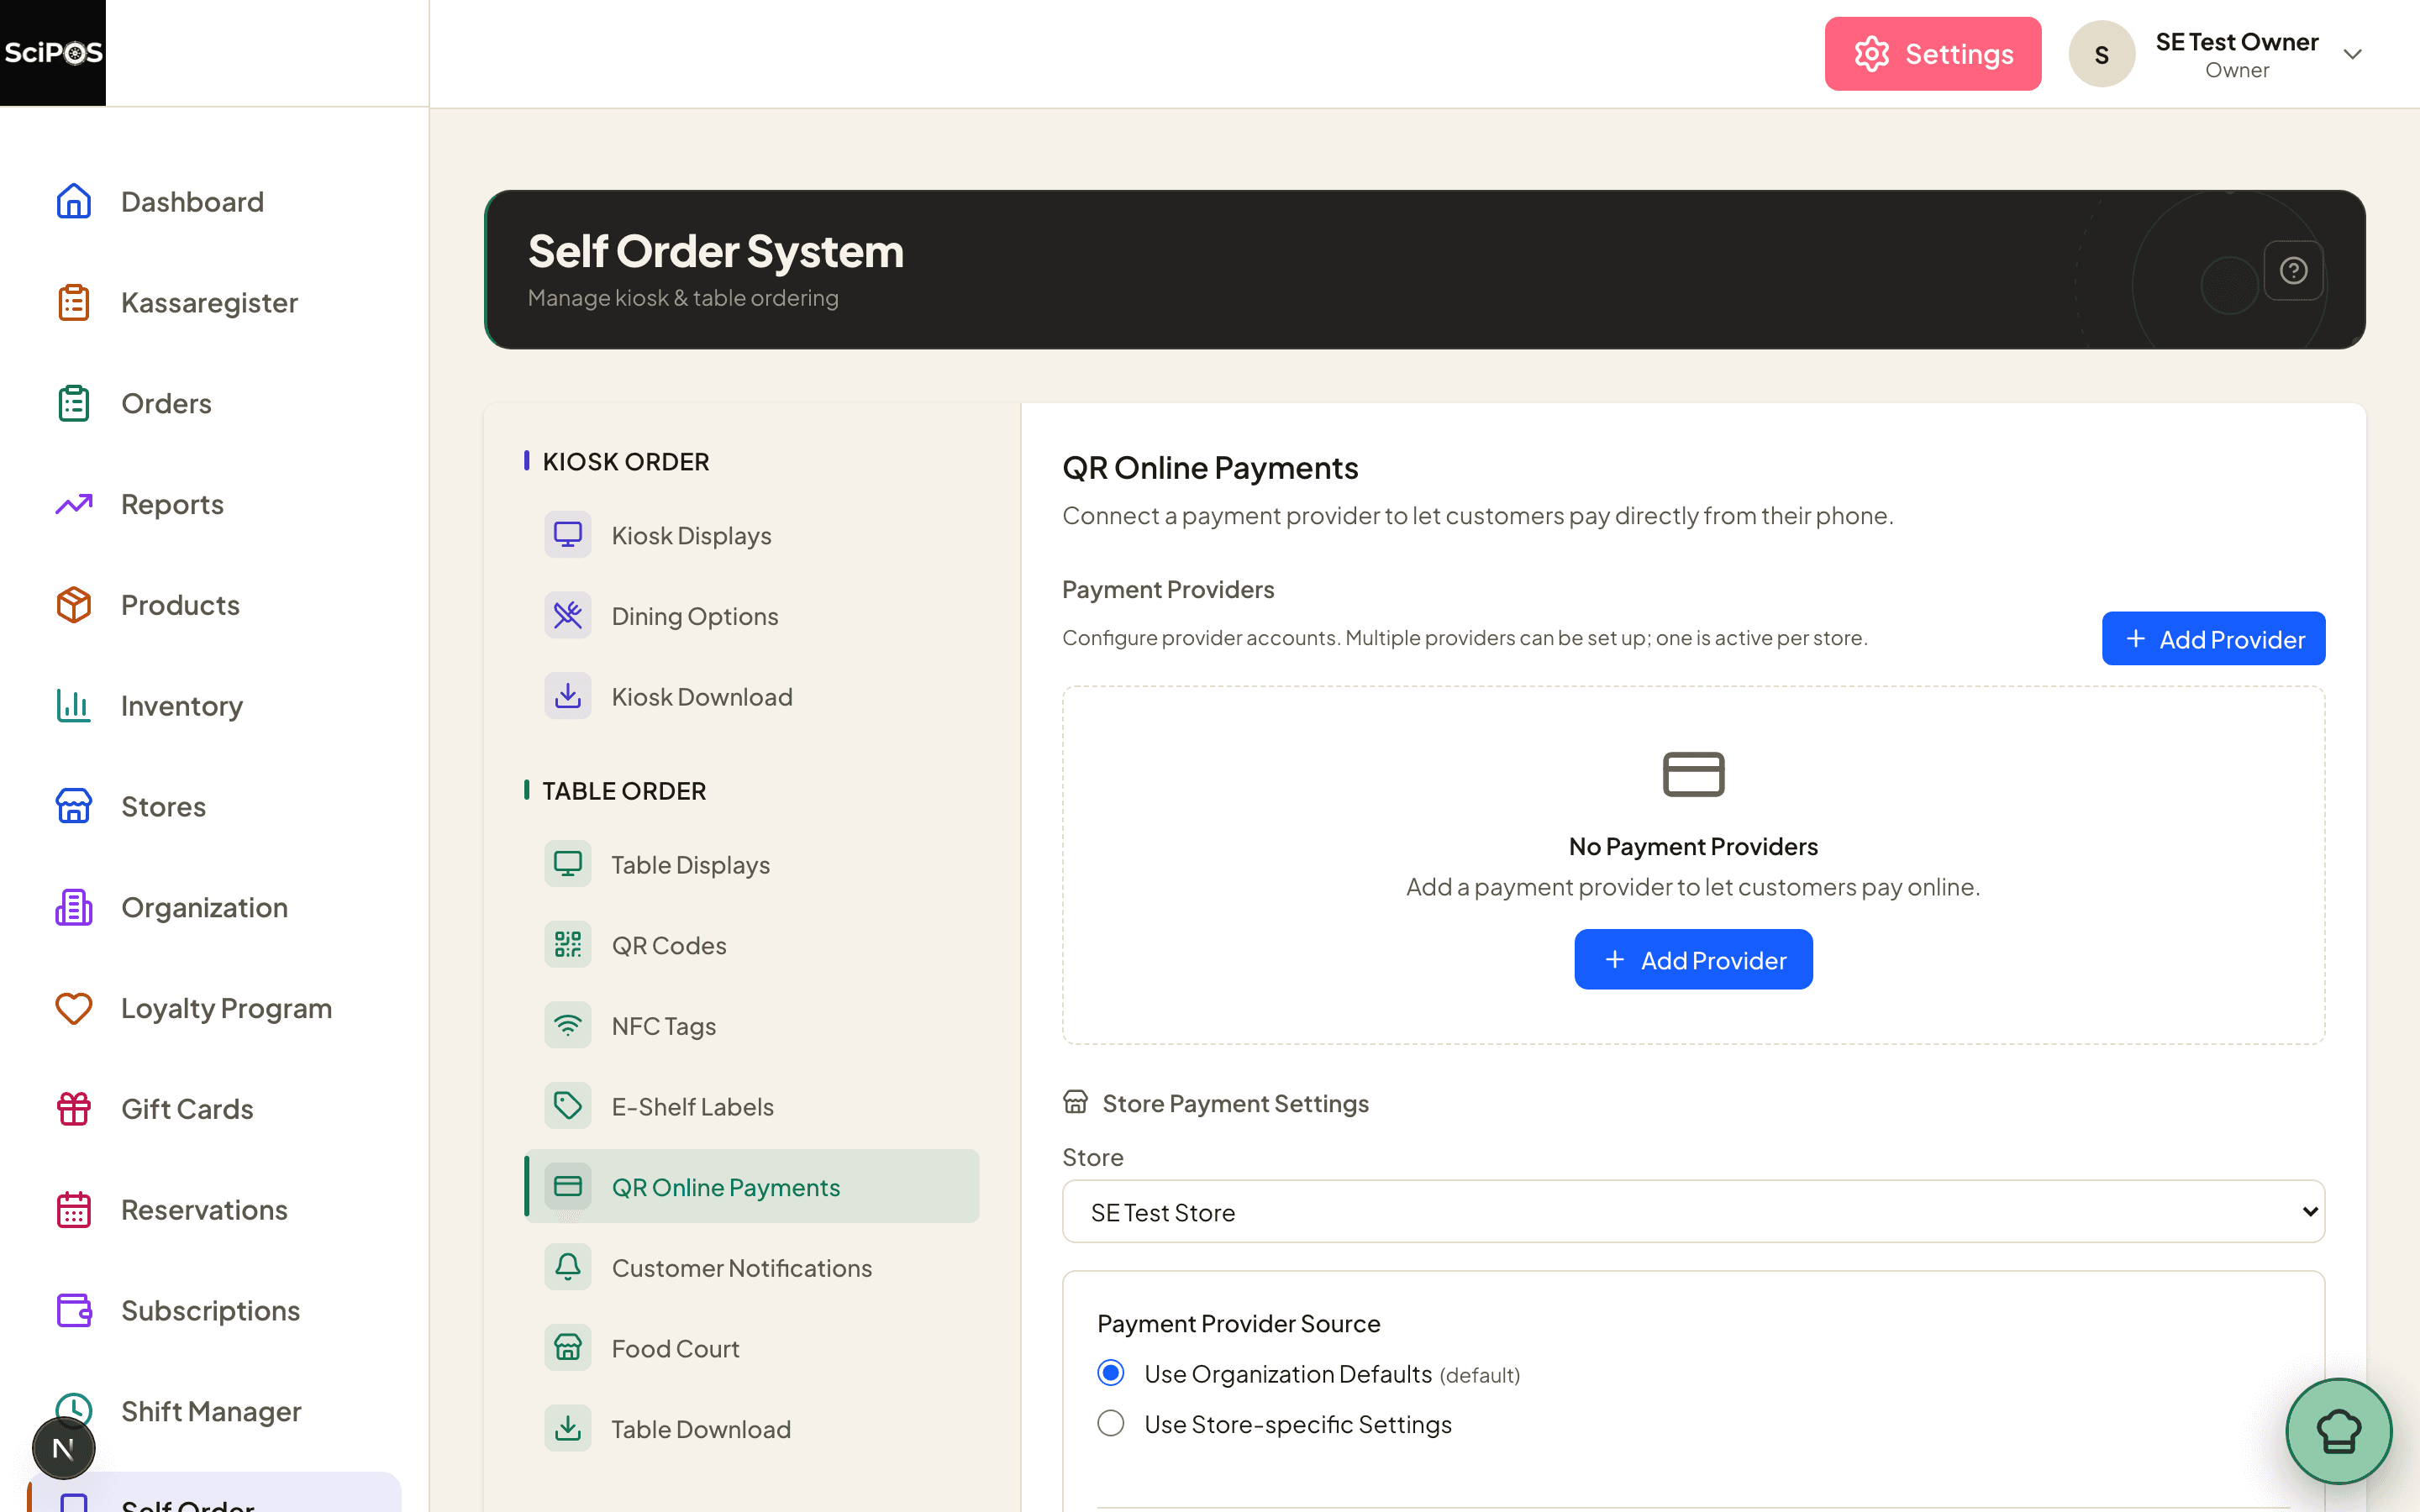
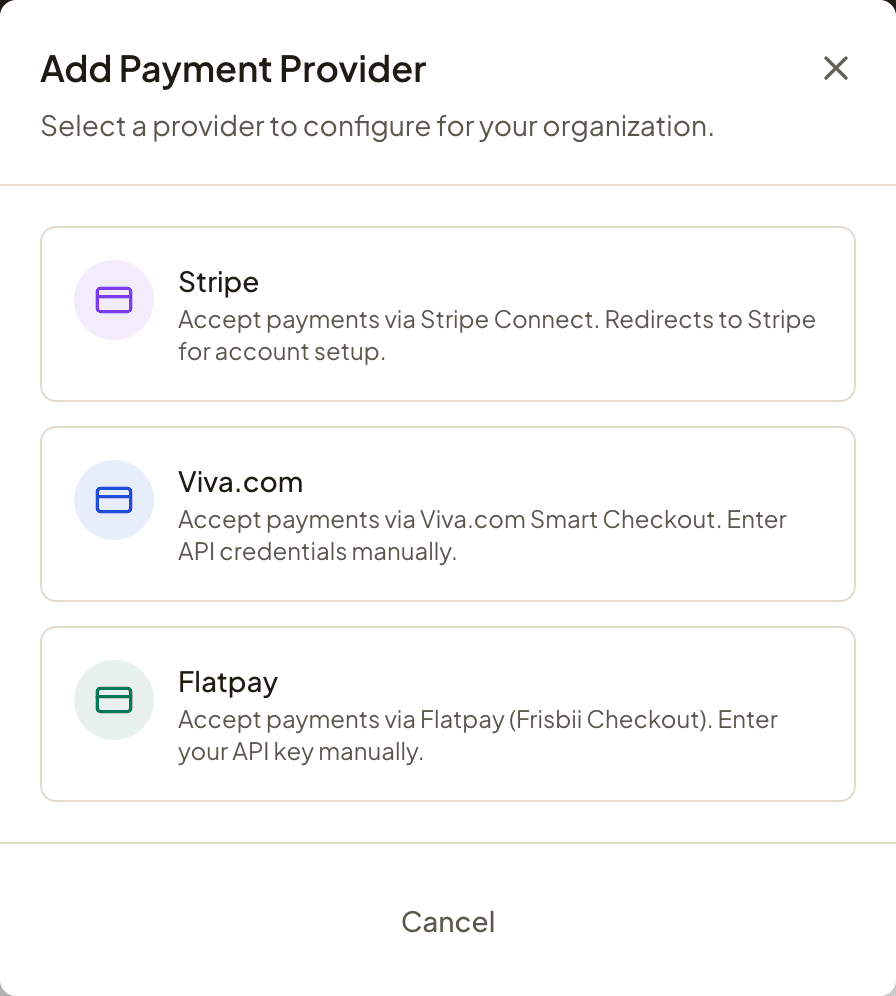
Select Add Provider, then choose Viva.com — its description reads "Accept payments via Viva.com Smart Checkout. Enter API credentials manually."
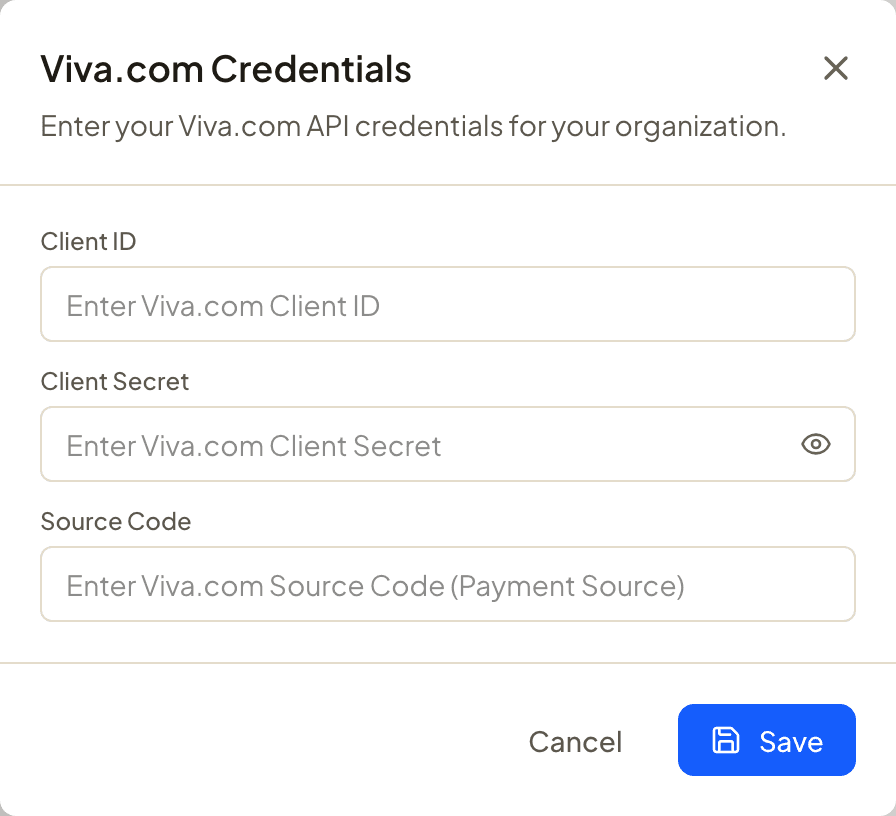
Paste the three values, with no leading or trailing spaces, and select Save.
Then set Default Payment Provider to Viva.com. Saving the credentials alone does not move your guests across — this is the step that makes Viva the provider that actually takes the money.
Turn on online payment, then test with a real card
Scroll down to Store Payment Settings, pick the restaurant, and leave Use Organization Defaults selected if it should follow the organisation. Switch on Enable Online Payment, then choose under Payment Timing whether guests pay after dining or pay before ordering.
Now make one genuine payment — this is the only test that proves anything:
- Scan a table QR code with a phone and place a small order.
- The phone should move to a Viva payment page showing your logo and name.
- Pay with a real card; a euro or two is enough.
- The phone should return to the ordering page and confirm the payment.
- The order should show as paid in the dashboard and reach the kitchen.
- The payment should appear in Viva, booked against the source you named in Step 1.
Refund the test from the dashboard afterwards — that also proves refunds work before you need one for a guest.
Signing in to Viva
Still not working?
| What you see | Most likely cause |
|---|---|
| Continue with Google does nothing, or returns to the login page. | The Google account has not been linked to the Viva account yet. Sign in with the email address and password, then link it from Viva’s security settings. |
| Viva shows no Client Secret, so I assume it was never set. | Viva never shows a secret after it is created — the page only ever offers "Forgot your secret code? Create a new one.", whether or not one exists. If you do not have it saved, generate a new one and copy it immediately, remembering that this invalidates the old secret. |
| The Viva.com row says Incomplete after I saved it. | One of the three values is missing or has a stray space. All of Client ID, Client Secret and Source Code are required; the row only reads Configured when all three are present. |
| The payment page will not open for guests. | Usually the wrong Client ID — the POS API one rather than the Smart Checkout one — or a mistyped secret. Re-copy both from Settings → API IDs, from the Smart Checkout IDs section. Also check that online payments are enabled on the Viva account at all. |
| The payment page opens but every card is declined. | Either the payment source is still awaiting Viva’s approval, or its Domain name does not match the ordering page. An unverified account also declines anything other than 0.10. |
| Guests are not offered card payment at all. | Either Enable Online Payment is off, or Default Payment Provider is still set to another provider. Saving Viva’s credentials does not select it. |
| A guest paid but the order is not marked paid. | Contact support. Payments are confirmed against Viva directly, so the money is not lost — the order usually settles by itself shortly afterwards. |
| The money arrived in the wrong Viva account. | The payment source’s Linked account points somewhere else. Change it on the source in Viva’s portal. |
| The payment page shows the wrong logo or name. | Update the Company logo on the payment source in Viva’s portal. It is Viva that renders that page, not Sciometa. |
| My Viva terminal credentials do not work for online payments. | They are different credentials for a different product. Card terminals use the POS API; table ordering uses Smart Checkout. Take the Client ID from under Smart Checkout IDs. |
| The QR Online Payments tab is greyed out and will not open. | The restaurant is not subscribed to Table Order System. The whole Table Order group stays dimmed until it is. |
| Can I use Viva if I have no Viva account? | No. Viva requires an account you already hold, because you type its credentials in by hand. If you have no account and do not want to open one, use Stripe instead — it creates the account for you. |