Sciometa POS · How-to guide
Connecting Stripe for Online Payments
Create the Stripe account that takes card payments from guests’ phones, and find the takings in the right place afterwards.
Den här guiden finns ännu inte på ditt språk, därför visas den engelska versionen.
Decide whether one account covers every restaurant
You can connect one account for the whole organisation, or a separate account per restaurant. Decide this before you start, because the money follows the choice.
| Choose | When |
|---|---|
| One organisation account | Every restaurant belongs to the same company and the takings should land in one bank account. This is the usual setup. |
| One account per restaurant | The restaurants are separate companies, have separate owners, or need their takings paid into separate bank accounts. |
The organisation account is set up once and every restaurant uses it automatically. A restaurant only needs its own when you switch it to Use Store-specific Settings — until then it follows Use Organization Defaults.
Start the connection from the dashboard
Open Self Order SystemQR Online Payments — it is under Table Order in the left-hand list.
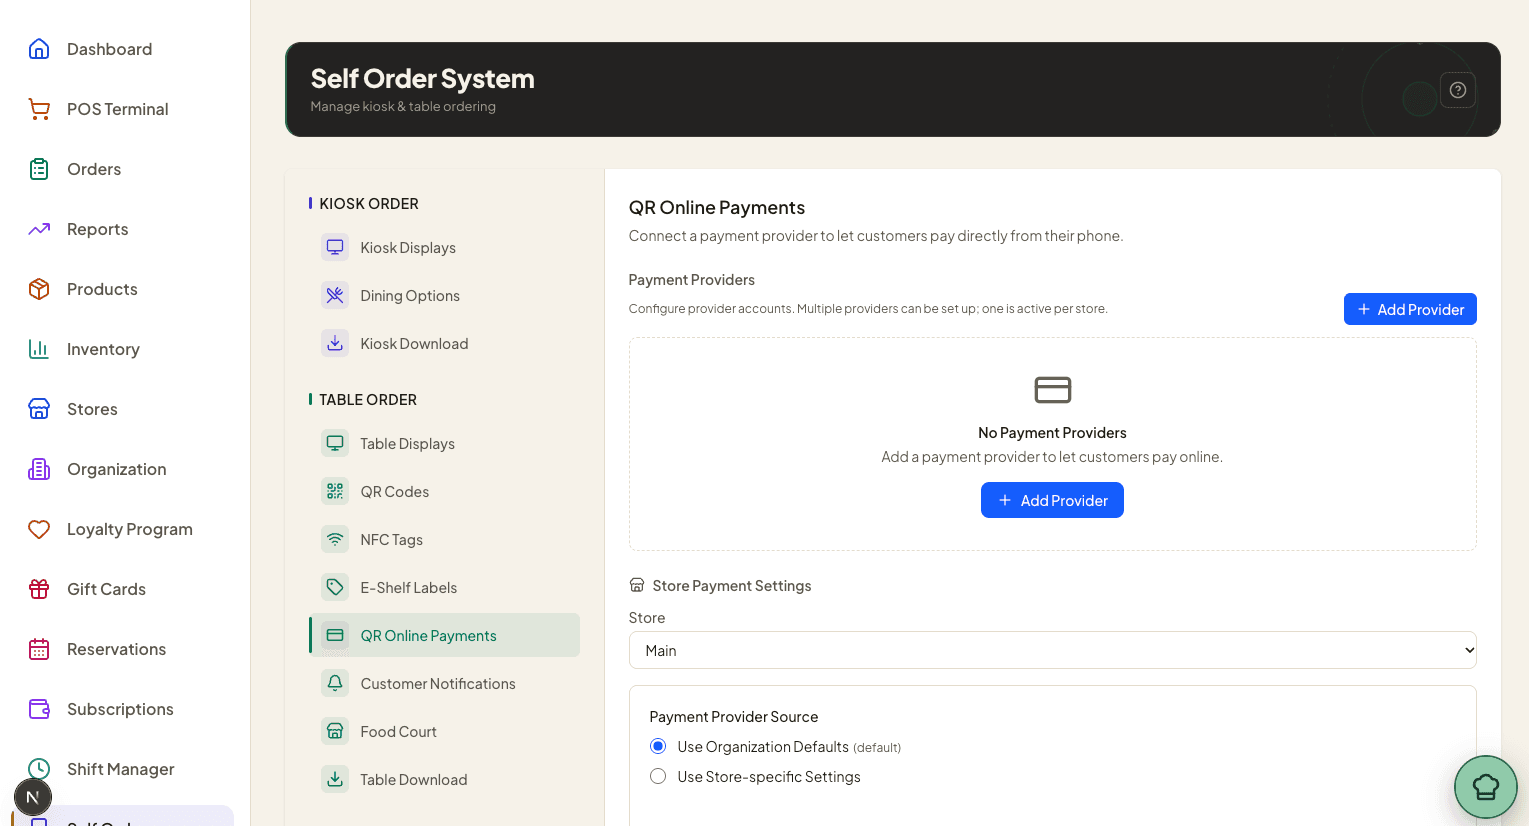
Select Add Provider. In the Add Payment Provider dialog, choose Stripe — its description reads "Accept payments via Stripe Connect. Redirects to Stripe for account setup.", which is exactly what happens next.
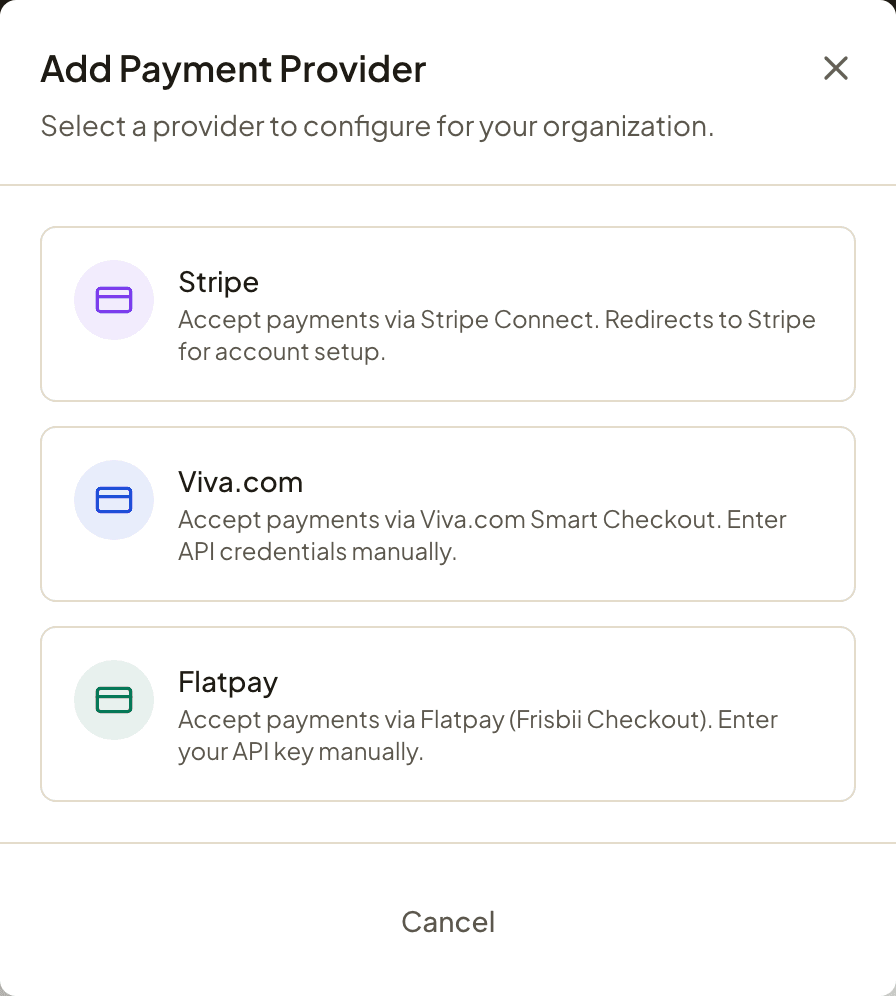
To connect a single restaurant instead of the organisation, pick the restaurant first and set it to Use Store-specific Settings — otherwise you are connecting the organisation account.
Fill in your details on Stripe
You do not need a Stripe account before you start. The account is created for you the moment you choose Stripe — there is nothing to sign up for at stripe.com first, and most restaurants arrive here with no Stripe account at all. What follows is filling in the new account, not logging in to an old one.
Choosing Stripe hands you over to Stripe's own secure onboarding, away from the Sciometa dashboard. You will know you are in the right place because the page says Sciometa Oy uses Stripe for secure payments and financial services.
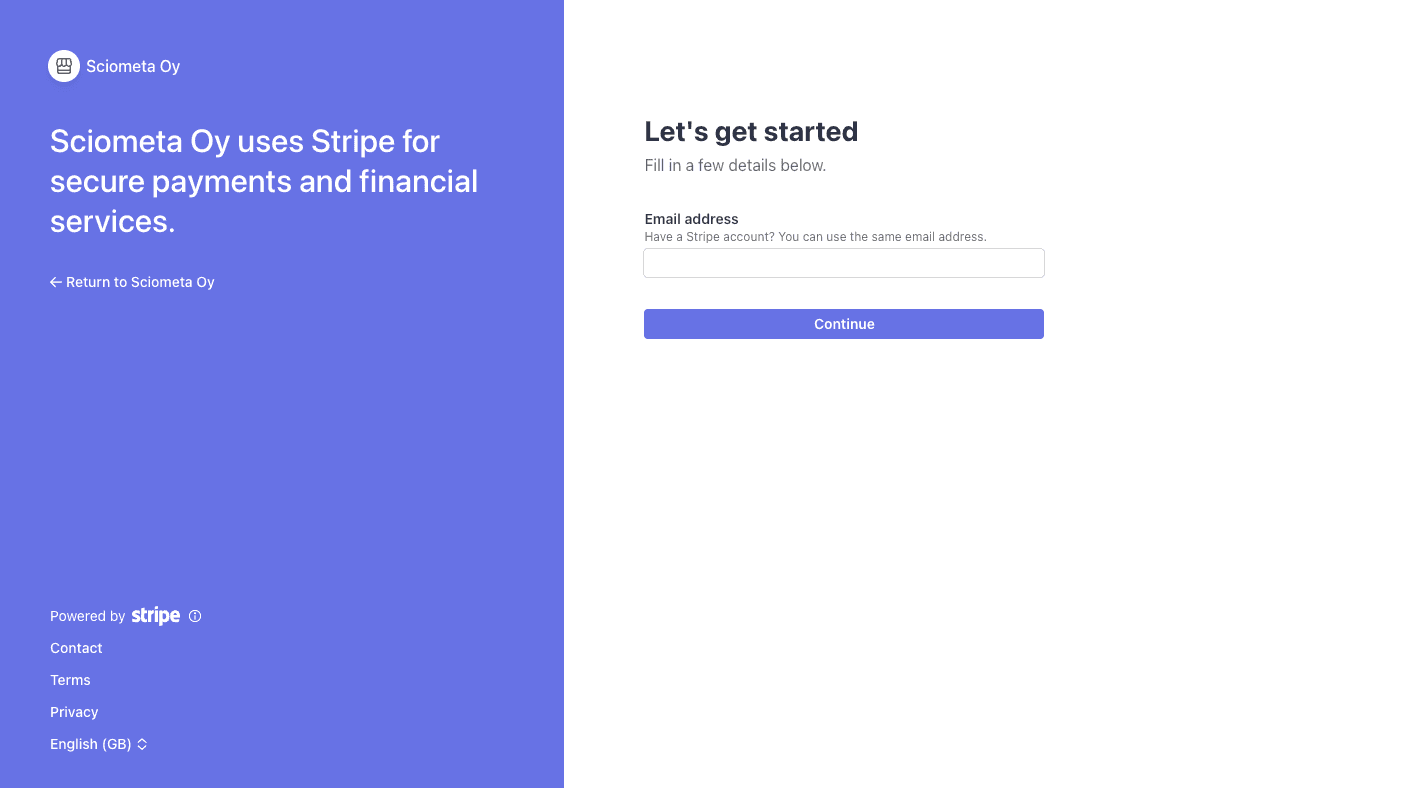
From here Stripe — not Sciometa — asks for:
- the company's legal details, including business type and registration number
- a representative's identity, usually with a photo of an ID document
- the bank account the money should be paid into
- a business description and the address shown to cardholders
Work through it to the end. Stripe decides what it needs, and the questions differ by country and company type, so follow its prompts rather than expecting a fixed list. When you finish, Stripe returns you to the dashboard automatically.
Confirm it is ready — and know where the money is
Back on Self Order SystemQR Online Payments, the Stripe card now reports the account's real state. The badge is the thing to read:
| Badge | What it means | What to do |
|---|---|---|
| Connected | The account is live and can take card payments. | Nothing. Switch on Enable Online Payment if you have not yet. |
| Setup Incomplete | Stripe's onboarding was not finished. | Select Complete Setup and finish the form. |
| Charges Disabled | Stripe has the details but is not letting the account charge yet. | Sign in to the Express account (below) and clear whatever Stripe is asking for. |
The card also spells out Charges and Payouts as Yes or No, and shows the account id beginning acct_. Both must read Yes before a guest can pay by card.
When money does arrive, Stripe holds it for a few days before paying it to your bank. The exact date is on Stripe's own Payouts page; it is set by Stripe, not by Sciometa.
Turn on online payment for guests
A connected account does not by itself put a pay button in front of guests. Scroll down to Store Payment Settings, select the restaurant, and leave Use Organization Defaults selected if it uses the organisation account.
Then switch on Enable Online Payment. If the switch will not move, its own subtitle tells you what is missing — Connect Stripe first, Complete Stripe setup first or Enable charges on Stripe first. Once it reads "Customers will see a 'Pay Online' button at checkout", guests can pay.
Finally choose under Payment Timing:
- Pay after dining — guests order course after course and settle at the end. This is the default.
- Pay before ordering — every order is paid as it is placed.
Still not working?
| What you see | Most likely cause |
|---|---|
| QR orders are being paid, but my Stripe balance is empty. | You are almost certainly signed in to a Stripe account you already had. QR takings go to the Express account this process created — sign in at connect.stripe.com/express_login, not at the ordinary Stripe dashboard. Confirm the account id matches the acct_ shown in the dashboard before treating it as a fault. |
| Guests are not offered a card payment option at all. | Either Enable Online Payment is off, or the account is not ready. Check that the badge reads Connected and that Charges says Yes. |
| The badge says Setup Incomplete. | Stripe’s form was left unfinished — easy to do, since it is long and sometimes needs a document. Select Complete Setup to resume it. |
| The badge says Charges Disabled. | Stripe is holding the account back, usually pending verification or a document it could not accept. Only Stripe can clear this; open its dashboard and act on what it asks for. |
| One restaurant takes payments but another does not. | The second is on Use Store-specific Settings without an account of its own. Either connect one for it, or set it back to Use Organization Defaults. |
| I already connected Stripe for reservations, so why is QR asking again? | They are deliberately separate connections. Reservations and gift cards link the Stripe account you already have; QR table ordering uses a new account we create. Connecting one never connects the other, so this is expected rather than a fault. |
| I do not have a Stripe account — can I still use QR payments? | Yes. Nothing needs to exist beforehand; the account is created when you choose Stripe, and Stripe then asks for your company and bank details. Do not sign up separately at stripe.com first — that account would not be the one connected. |
| The QR Online Payments tab is greyed out and will not open. | The restaurant is not subscribed to Table Order System. The whole Table Order group stays dimmed and unclickable until it is. |
| I cannot see the option to add a provider. | Connecting Stripe needs owner or manager access, and the organisation-wide account needs an owner. A cashier will not see it; a manager may see only their own restaurant. |
| The money that arrived is less than the guest paid. | Stripe deducts its own processing fee from each payment. Sciometa adds no fee of its own to QR payments. The breakdown of any single payment is on Stripe’s dashboard. |